
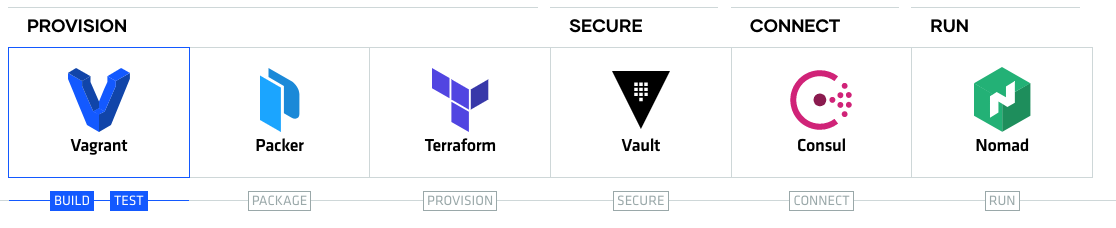
Complete HashiStack
Instroduction
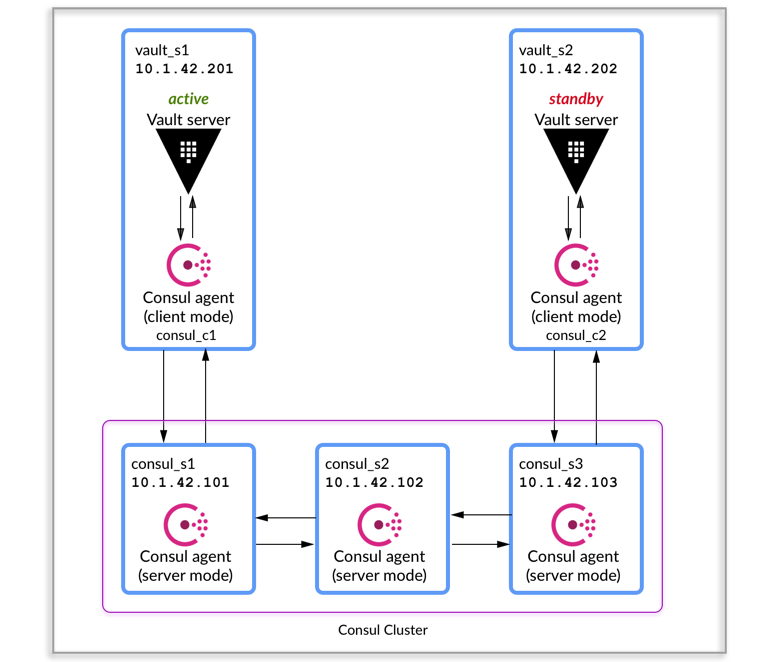
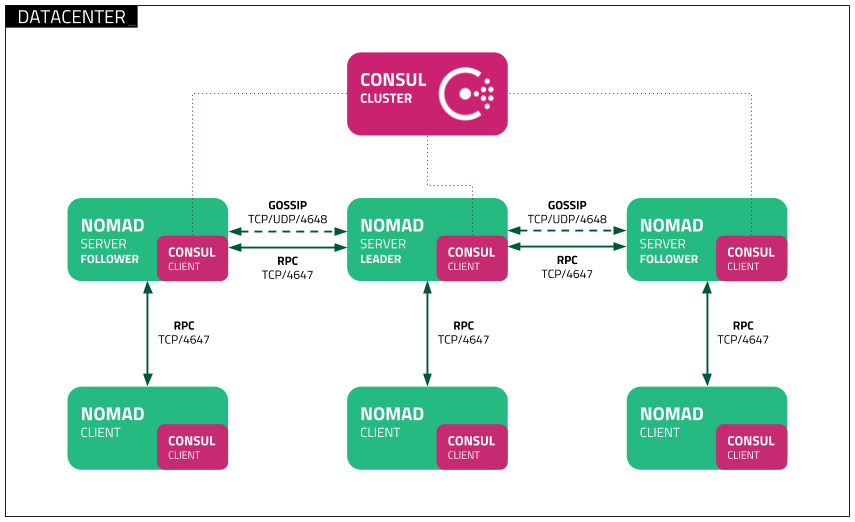
This repository helps you to setup your development environemt and also setup production environment with 3 master nodes and 2 clients.
Motivation
Build and Test Environment
Build and test Environment helps you to explore the tools and test your changes on vagrant. You can modify the number of servers on vagrant file to test the changes.
The Final Test Environment inclides:
- Vagrant
- Consul 1.7.3
- Nomad 0.11.1
- Vault 1.4.1
Prerequsites
- MacOS (Linux testing in progress)
- Homebrew
brew install packer terraform nomadbrew cask install virtualbox
Usage
Update your number of servers depends on your system memory and CPU and run below command to explore hashi tools
$ cd vagrant
$ vagrant up
Deployment
Connect nomad cluster and run below command to install job on nomad, please make sure you have enough resources to run the jobs
$ vagrant ssh server-1
$ nomad run -address http://172.20.20.11:4646 /tmp/jobs/nginx.nomad
$ nomad run -address http://172.20.20.11:4646 /tmp/jobs/simple.nomad
Access
Use the private IP address to access the applications, in this
Access Nomad Cluster http://172.20.20.11:4646

Access Consul Cluster http://172.20.20.11:8500

Access Vault Cluster http://172.20.20.101:8200

Access Hashi UI http://172.20.20.11:3000
Enterprise Setup
This enterprise setup helps you to setup High Availability cluster with 3 masters and 2 clients on AWS.
The Final Environments Includes:
- Packer
- Terraform
- Nomad
- Consul
- Vault
Prerequsites
- Install Packer and Terraform
- AWS access credentials
- AWS private key
Usage
Uset setup.sh scripts helps you to setup cluster environment on AWS. Update your AWS credentials in variables.tf and run the script
sudo bash setup.sh
Access
With AWS environment we don't have an option to access UI as it's setup with Private IP, but with help of Hashi UI we can access Nomad and Consul
Use the Output of AWS public IP and access hashi UI
Access Hashi UI with http://awspublicip:3000
Troubleshooting
Please raise a github issue, if you had any issue with setup.